
INSTALL SYNEX
Installation Guide
In this section we will explain in detail how to install your operating system.
📖 Synex Installation Manual
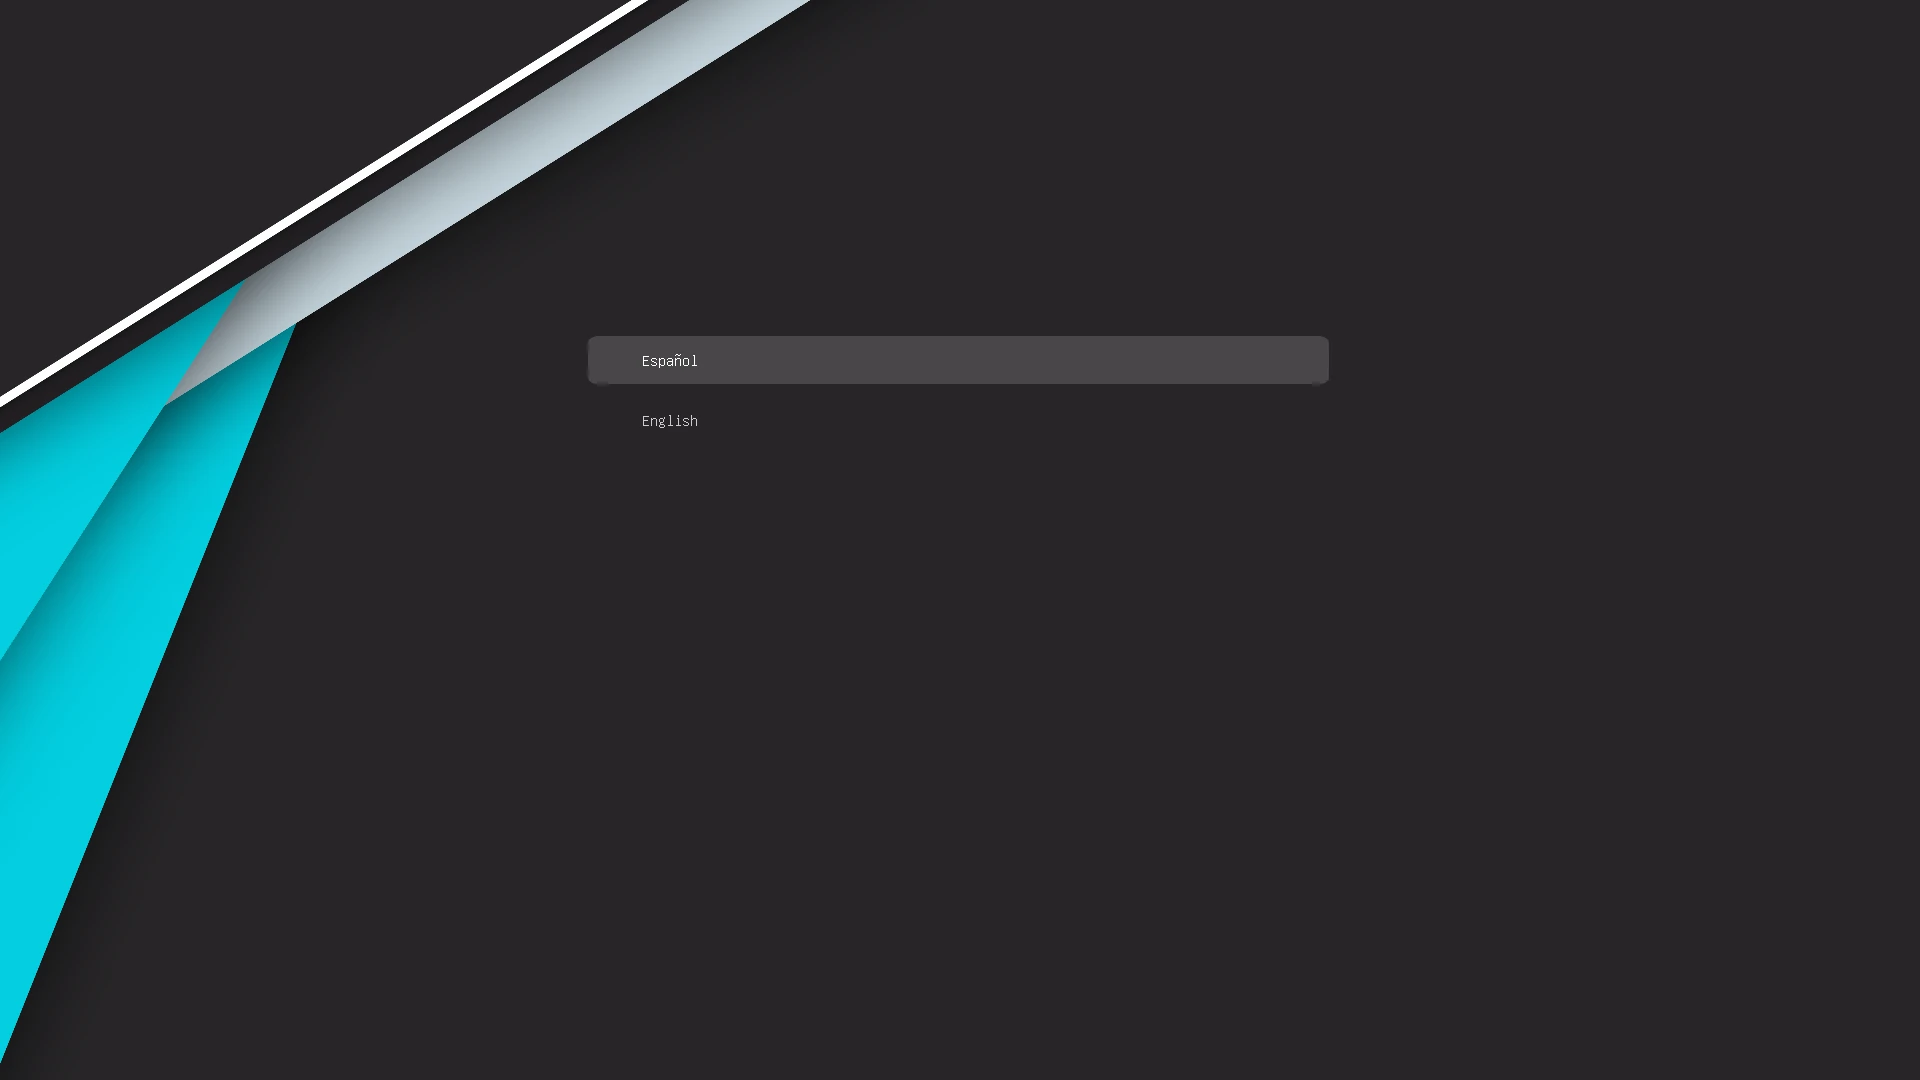
1. Language Selection at Boot
When starting from the installation media (USB/DVD), you will see the GRUB screen. Here you can choose the boot language of the live system. Select English (or your preferred language) to start the environment accordingly.
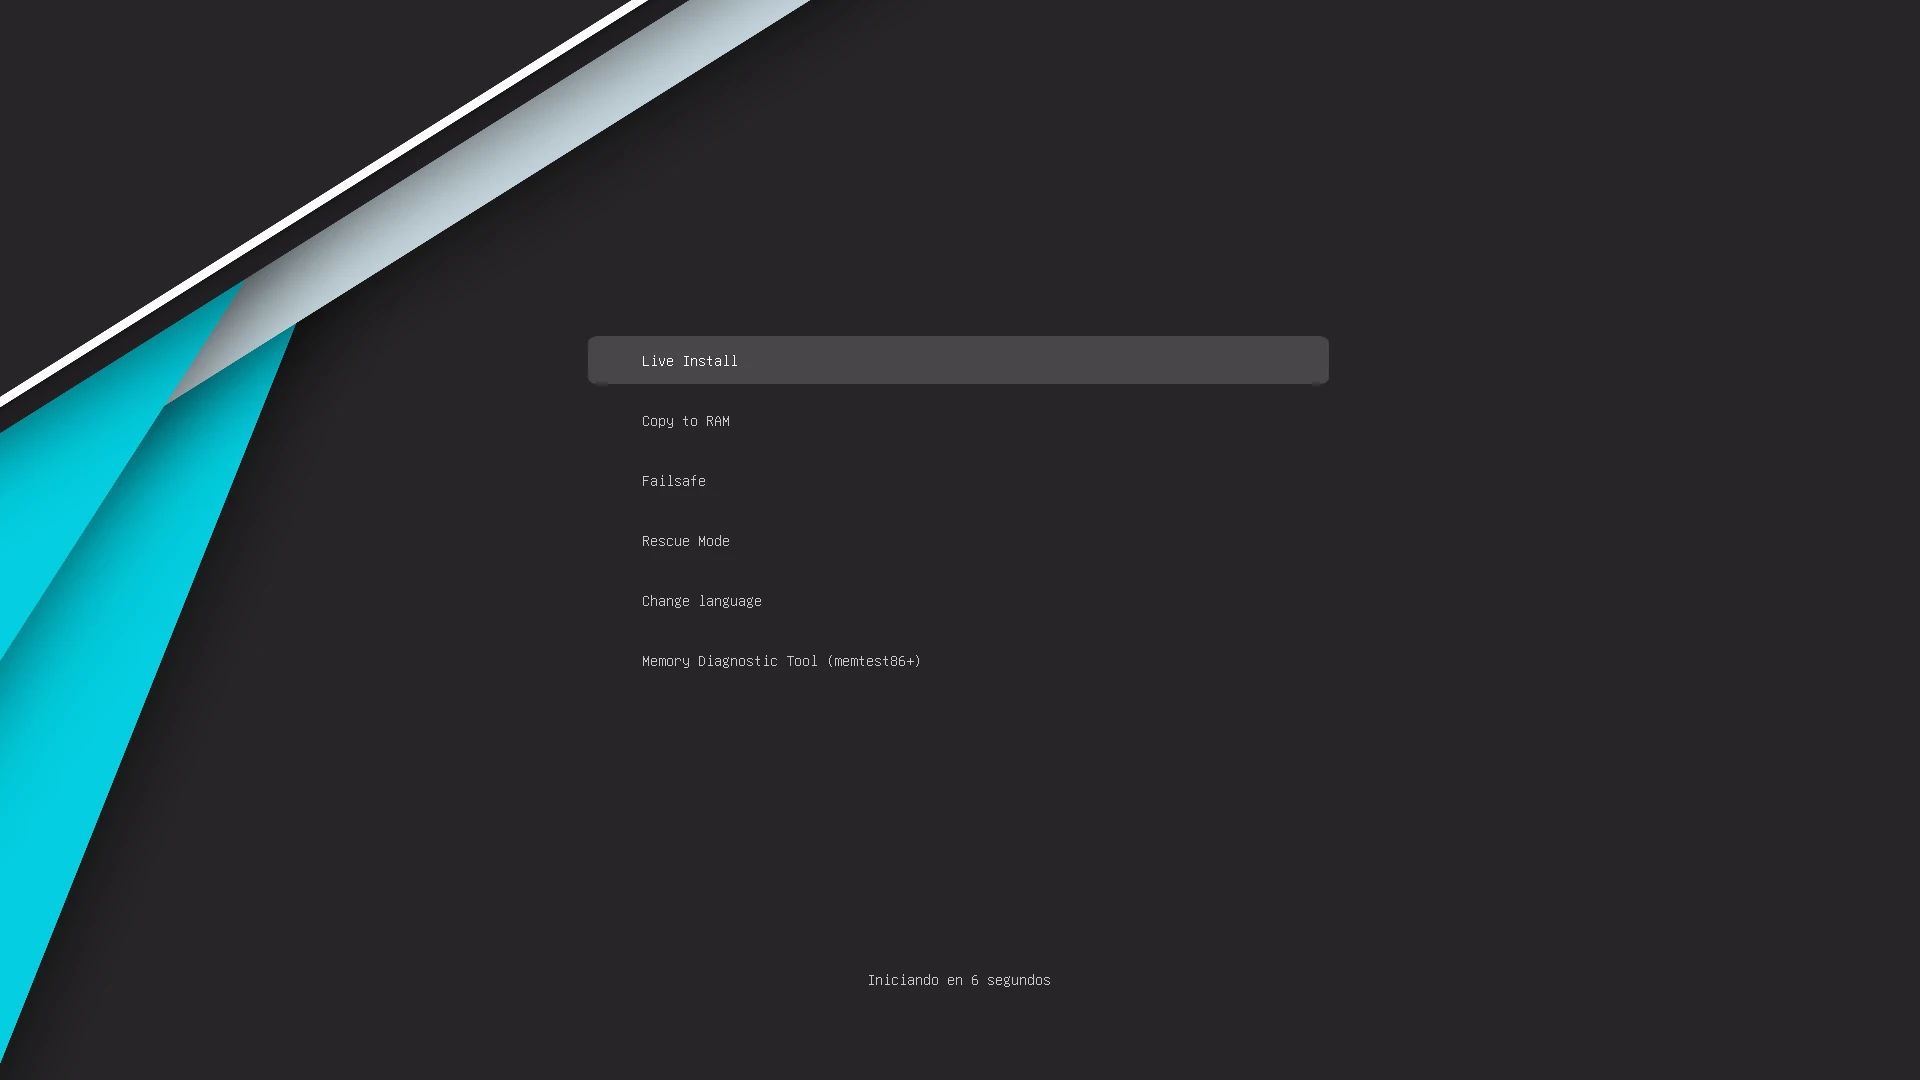
2. Live System Boot
In the boot menu, select the option Live Install. This will load the full desktop environment without installing anything yet.
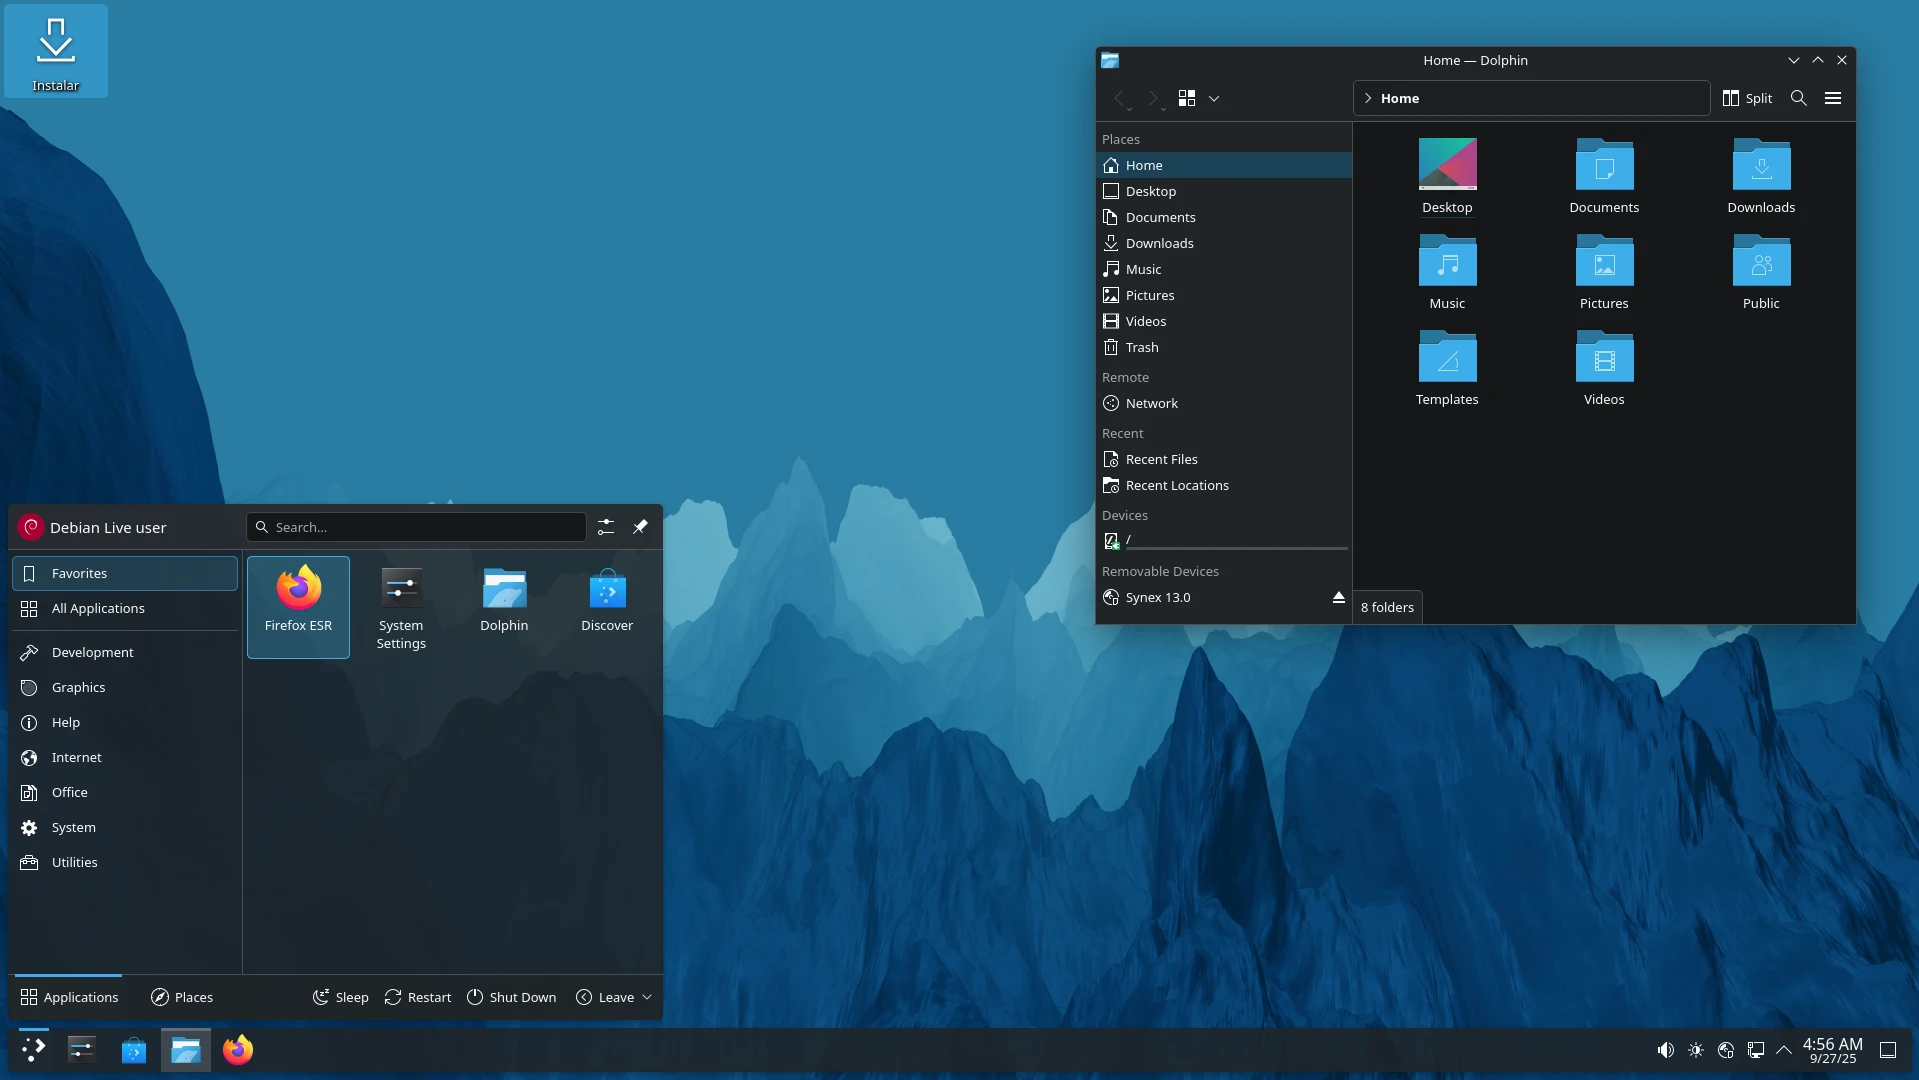
3. Start the Installer
On the desktop, you will find the Install icon. Double-click it to begin the installation process. If the icon does not appear on the desktop, you can find it by clicking Start Menu → System → Install.
4. Installation Steps
Language selection
Choose the language you prefer for both the installer and the final system.
Location
Select your region and city to configure time automatically.
Keyboard
Choose the layout that matches your keyboard (e.g., English US or English GB).
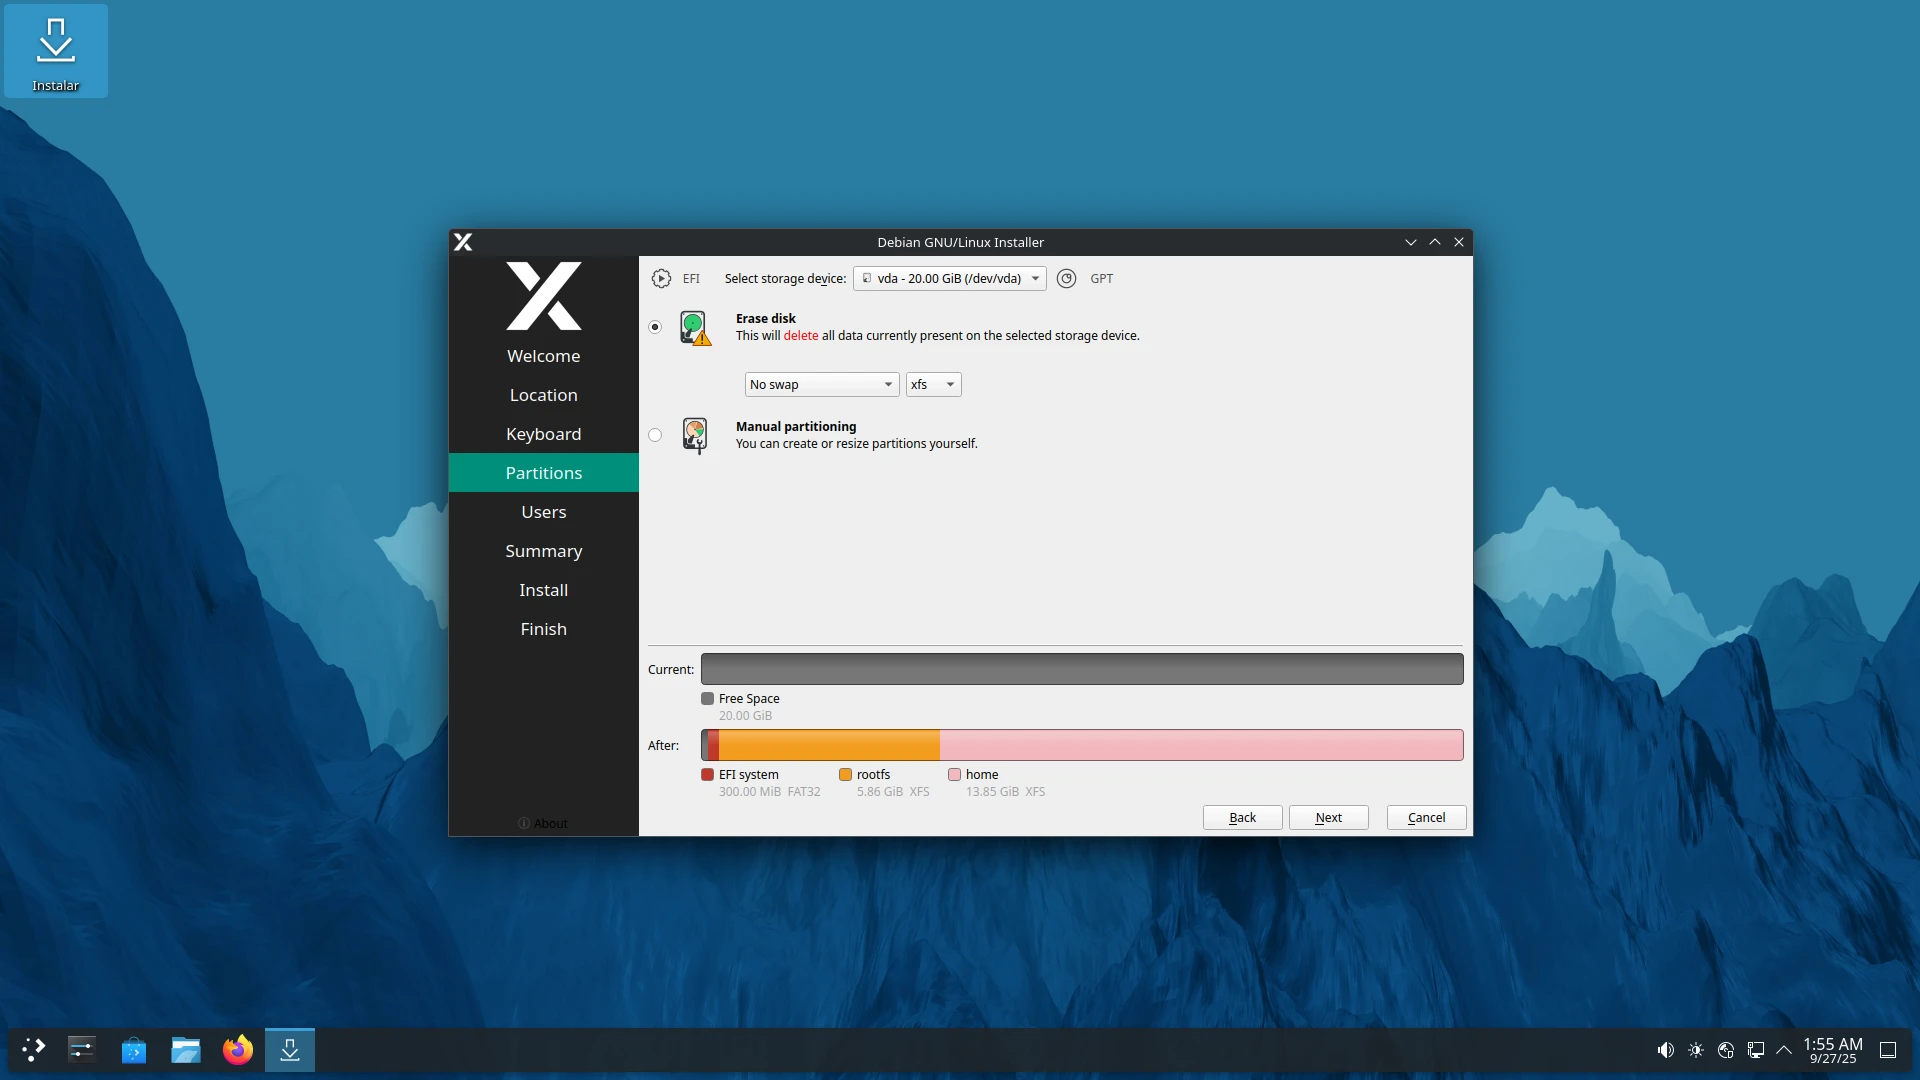
Partitions
You can choose between:
- Erase Disk (automatically creates
/and/homepartitions). - Manual Partitioning (ideal if you want to keep other systems or customize partitions).
Users
Set your username, password, and computer name.
Summary
A summary will be displayed with all selected options before proceeding.
Install
The system will copy the files and automatically configure your installation.
Finish
Once completed, you can restart your computer and start using Synex installed on disk.
5. Post-Installation
After installation, we recommend:
-
Configure your network connection.
-
Run system updates.
-
Explore software repositories and Flatpak to install additional applications via Discover.
-
Optional: If you have an NVIDIA graphics card, install the
synex-nvidia-helperpackage and run it to install the latest official NVIDIA drivers.